Author

Sumit Bahl

Browsing

Here we share a guide to Download and Install LineageOS 17.1 ROM on your Android devices. LineageOS is the most popular third-party ROM out for those that want to sideload Android builds on their own devices. The latest LineageOS 17.1 is based upon Android 10 and available officially. You can Download Android 10 based LineageOS 17.1 for all Android devices.

The new LineageOS 17.1 offers all of the Android 10 features with additions such as a partial screenshot functionality, on-screen fingerprint sensors support, pop-up, and rotating cameras, Wi-Fi Display, the successor to the CyanogenMod Theme Engine, Lineage Recovery, and many smaller changes. Download and Install LineageOS 17.1 ROM on your Android devices from below

This method to install LineageOS 17.1 ROM on Android devices is not device-specific. If a LineageOS 17.1 ROM is available for your device, then you can use this guide. To install LineageOS 17.1 on your Android device, all you need is a rooted device with a custom TWRP recovery, Android 10 Gapps and LineageOS 17.1 ROM for your device. You can find step by step guide to Install and Download Android 10 based LineageOS 17.1 for all Android devices.

LineageOS 17.1 Features:

  • A new partial screenshot UI was implemented that lets you hand select smaller parts of your screen and edit the screenshots. So, feel free to go give it a “shot”!
  • We know many of you have been waiting for news on themes since the CyanogenMod Theme Engine’s deprecation in CyanogenMod 13.0, and those of you in this boat are in for a treat!
    • AOSP’s new ThemePicker app was adapted to have the range of accents you’ve become used to with our old implementation, Styles.
    • We also opted to enable support for font change, icon shape (both QuickSettings and Launcher) and icon style changes (eg. changing the style of the Wi-Fi/Bluetooth icons).
  • Trebuchet has long been able to hide apps from the Launcher and protect them with a passcode/password, but now you can also use your biometric sensor to authenticate as well!
  • October, November, December 2019 and January, February, March 2020 security patches have been merged.
    • Builds are currently based on the android-10.0.0_r31 tag, which is the Pixel 4/4 XL’s tag.
  • Wi-Fi display is available once again.
  • Support for on-screen fingerprint sensors (FOD) has been added.
  • Support for pop-up and rotating cameras has been added.
  • Support for Australian English, Lithuanian, Latvian, Dutch, Romanian, Slovenian, Serbian and Turkish spell checking has been added to AOSP keyboard.
  • AOSP keyboard available emojis have been updated to Emoji 12.0.
  • WebView has been updated to Chromium 80.0.3987.132.

Download Android 10 based LineageOS 17.1 for all Android devices

  • Download LineageOS 17.1 ROM – Download

How to Install LineageOS 17.1 ROM on your Android phone

1) First, download and install a custom recovery. If you already had a custom recovery installed on your device then skip this step.

2) Download the LineageOS 17.1 ROM and save it on your device.

3) Now Boot your device into Recovery mode by press and hold “Volume Down+Power Button” (It may differ from your device).

4) Now you will enter into recovery mode. Now in TWRP, create a Nandroid backup (Recommended) of your device for safer side, if anything goes wrong.

5) Now do a Factory Reset by Goto Wipe>Advanced Wipe>Select Wipe cache, Dalvik cache, System, and data and swipe to confirm it.

6) Now, Go to Install and locate the ROM zip file & swipe to Install the ROM file. After the process completes, Flash the GApps zip file (Optional).

7) Now wipe cache & Dalvik cache again and Reboot your device.

7) Done!

This is the complete guide to Install LineageOS 17.1 ROM on your Android phone. Let us know if you have any questions via the comments below.

Good news for Motorola users, the latest stable Android 10 update for Moto Z4  starts rolling out. The update is rolled out for locked (Verizon) and unlocked version of Moto Z4 in the United States. You can Download Moto Z4 Android 10 OTA Zip from below to Update Moto Z4 to Android 10.

The new Moto Z4 Android 10 update has the software version QPF30.130-15-7 and rolling out in a phase-wise manner which means maybe you will get the update tomorrow or maybe next 1-2 weeks. If you don’t want to wait, you could just go to Settings and manually check or follow the below guide or Download Moto Z4 Android 10 OTA zip file from below to update it manually.

The new Android 10 OTA Update for Moto Z4 brings all Android 10 features like a system-wide dark mode, privacy enhancements to location permissions, and improvements to notifications, along with January 2020 security patch. You can manually update Moto Z4 to Android 10 by downloading the OTA file from below.

Before You Begin

  • This method is device-specific. Don’t try this on any other device.
  • Follow the steps correctly otherwise, you may brick your device. We Guidegeekz.com is not responsible for any damage to your phone.
  • Charge your device to 60- 70% to prevent it from the accidental shutdown.
  • Take a complete backup of everything important.

Download Android 10 Update for Moto Z4

  • Moto Z4 Android 10 OTA Zip – Coming Soon
  • Moto Z4 Amazon Android 10 Firmware – Download
  • Moto Z4 XT1980 Android 10 Firmware for RETCA Download
  • Moto Z4 Android 10 Firmware for RETUSDownload
  • Moto Z4 Verizon Android 10 Firmware – Coming Soon

How to Install Android 10 Update on Moto Z4 –

Method 1 for OTA Update–

1) Download Moto Z4 Android 10 OTA Zip from above and save it to internal memory.

2) Reboot Moto Z4 to Recovery mode by using the command adb reboot bootloader or by using the below steps.

  • Turn Off your device
  • Press and hold ‘Vol Up+Vol Down+Power’ button
  • You will see no command with dead Android
  • Now press Volume Up + power to enter into recovery mode.

3) In recovery mode select Apply update from SD Card.

4) Choose the zip file and wait.

5) Done! Reboot your phone after the process complete.

Method 2 – Install Android 10 Factory Image on Moto Z4 

  1. First, enable the USB debugging option from setting ->developer option. To enable Developer Options, go to About phone and tap the Build Number 7 times.
  2. Download ADB and Fastboot and install it on your PC.
  3. Now Download the correct firmware for your device from above and extract it to the ADB installation directory.
  4.  Now go to adb and fastboot installation directory and open the command window there by pressing and hold the ‘shift’ key and right-click anywhere in that folder.
  5. Now Reboot your phone into Bootloader mode by turn it off and press and hold ‘Power + Volume Down‘.
  6. Now issue the below commands one by one. (If you are using mfastboot then type ‘mfastboot‘ instead of ‘fastboot‘)
    fastboot getvar max-sparse-size
    fastboot oem fb_mode_set
    fastboot flash partition gpt.bin
    fastboot flash bootloader bootloader.img
    fastboot flash modem NON-HLOS.bin
    fastboot flash fsg fsg.mbn
    fastboot erase modemst1
    fastboot erase modemst2
    fastboot flash dsp adspso.bin
    fastboot flash logo logo.bin
    fastboot flash boot boot.img
    fastboot flash recovery recovery.img
    fastboot flash system system.img_sparsechunk.0
    fastboot flash system system.img_sparsechunk.1
    fastboot flash system system.img_sparsechunk.2
    fastboot flash system system.img_sparsechunk.3
    fastboot flash system system.img_sparsechunk.4
    fastboot flash system system.img_sparsechunk.5
    fastboot flash system system.img_sparsechunk.6
    fastboot flash system system.img_sparsechunk.7
    fastboot flash system system.img_sparsechunk.8
    fastboot flash system system.img_sparsechunk.9
    fastboot flash system system.img_sparsechunk.10
    fastboot flash system system.img_sparsechunk.11
    fastboot flash oem oem.img
    fastboot erase carrier
    fastboot erase DDR
    fastboot oem fb_mode_clear

    7) Done! Above steps will flash Stock Android 10 Firmware of Moto Z4.

    Done!

Wrapping Up:

Moto Z4 brings all Android 10 features and will soon be available for all via OTA but if you’re the impatient type then you could follow the above procedure to Download and Install Android 10 Update for Moto Z4. If you have any questions related to this post, feel free to leave that in the comment section.

Good news for Realme users, the latest stable Android 10 update for Realme X2 Pro starts rolling out. The latest Realme X2 Pro Android 10 update is based on Realme UI and brings tons of new features and optimizations. You can Download Realme X2 Pro Android 10 OTA Zip from below to Update Realme X2 Pro to Android 10.

The Realme X2 Pro Android 10 update has the software version RMX1931EX_11.C.23. The update is rolling out in a phase-wise manner, which means maybe you will get the update tomorrow or maybe next 1-2 weeks. If you don’t want to wait, you could just go to Settings and manually check or follow the below guide. Download Realme X2 Pro Android 10 OTA zip file from below.

The new Android 10 OTA Update for Realme X2 Pro brings Realme UI 1.0 based on Android 10 and features like Visuals update, smart sidebar, Navigation Gestures 3.0, Gaming optimization, battery, and security optimization and many more. You can manually update Realme X2 Pro to Android 10 by downloading the OTA file from below. You can check the complete changelog of Realme X2 Realme UI 1.0 from below.

Changelogs of Realme X2 Pro Android 10 update:

  • Visuals
    • Updated UI to realme UI
    • Brand new Real Design makes visuals more attractive and operation more efficient.
  • Smart Sidebar
    • Optimized user interface and improved one-handed operation.
    • Optimized Smart Sidebar: Replaced File Console with File Manager; removed OSIE Visual Effect and No Notification Alerts.
    • Drag an app out of Smart Sidebar to open it in Split-screen Mode.
    • Added two new features: “Assistive Ball Opacity” and “Hide Assistive Ball on Fullscreen App”.
    • Optimized the Floating Window feature for more apps.
    • Added Bubbles: A bubble is displayed when you open an app in a floating window from the Smart Sidebar. Tap the bubble to collapse or open the app.
  • Screenshot
    • Optimized 3-Finger Screenshot Gesture: Use 3 fingers to touch and hold the screen, and swipe to take a screenshot of the selected part of the screen (partial screen capture). Use 3 fingers to touch and hold the screen, and swipe your fingers outwards to capture a long screenshot.
    • Added screenshot settings: You can adjust the position of the screenshot preview floating window and set the screenshot sound.
    • Optimized screenshot preview floating window: After taking a screenshot, drag it up and release to share it, or drag it down and release to take a long screenshot.
  • Navigation Gestures 3.0
    • Optimized gestures: All gestures are supported in landscape mode.
  • System
    • Added Focus Mode: Minimizes outside distractions when you are learning or working.
    • Added whole new charging animation.
    • Optimized the Quick Settings user interface for easier one-handed operation.
    • Added pause feature for screen recording.
    • Added a floating window and settings for screen recording.
    • New sounds added for file deletion, calculator key touches, and compass pointer.
    • Optimized system built-in ringtones.
    • Added TalkBack floating prompts for Accessibility.
    • New management feature for recent tasks: You can view memory of recent tasks and locked apps.
  • Games
    • Optimized visual interaction for Game Space.
    • Optimized loading animation for Game Space.
  • Homescreen
    • Added new live wallpapers.
    • Added artistic wallpapers.
    • Added option to open Global Search or the notification panel when swiping down on homescreen.
    • Added option to customize the size, shape, and style of app icons on homescreen.
    • Optimized the graphic design of password unlock to facilitate one-handed operation.
    • Support for animated wallpapers on the lockscreen.
    • Added a Simple Mode for homescreen, featuring larger fonts, icons and a clearer layout.
  • Security
    • Random MAC address Generator: When your phone is connected to Wi-Fi network system generates a random MAC address to avoid targeted ads and protect your privacy.
  • Tools
    • In Quick Settings or Smart Sidebar, you can open Calculator in a floating window.
    • Added the trim feature in Recordings.
    • Added the Weather (dynamic) ringtone, which automatically adapts to the current weather.
    • Added weather-adaptive animations in Weather.
  • Camera
    • Optimized the Camera UI for better user experience.
    • Optimized the Timer UI and sound.
  • Photos
    • Optimized the Album UI for a clearer structure and photo thumbnails.
    • Added Album Recommendations that recognize more than 80 different scenes.
  • Communications
    • realme Share now supports sharing files with OPPO, Vivo and Xiaomi devices.
    • Optimized the Contacts UI for a more efficient experience.
  • Settings
    • Search Settings now supports fuzzy match and contains a search history.
  • Application
    • Added YT music
  • Battery
    • Updated decimals display during charging
    • To deepen user’s perception of fast charging, it will always be displayed when your phone is charging and the screen is bright.

Before You Begin

  • This method is only for Realme X2 Pro. Don’t try this on any other device.
  • Follow the steps correctly otherwise, you may brick your device. We Guidegeekz.com is not responsible for any damage to your phone.
  • Charge your device to 60- 70% to prevent it from the accidental shutdown.
  • Take a complete backup of everything important.

Download Android 10 Update for Realme X2 Pro

  • Realme X2 Pro RMX1931EX_11.C.23 OTA – Download

How to Update Realme X2 Pro to Android 10 –

Method 1 –

1) Download Realme X2 Pro RMX1992AEX_11.C.05OTA Zip from above and save it to internal memory.

2) Reboot Realme X2 Pro to Recovery mode by using the below steps.

  • Turn Off your device
  • Press and hold the ‘Vol down+Power’ button.

3) Choose the language you want.

4) In recovery mode select Install from storage device.

5) Choose the zip file from phone storage or From the SD card and wait.

6) Done! Reboot your phone after the process complete.

Method 2 –

  1. Download the Realme X2 Pro Android 10 OTA zip file from above and save it on your device.
  2. Go to download folder and rename the file to update.zip
  3. Place it to the root directory of internal storage.
  4. Click the firmware to start the update.
  5. Wait for the update to finish and restart when prompted.

Wrapping Up:

Realme X2 Pro brings all Android 10 features along with new Realme UI and will soon be available for all via OTA but if you’re the impatient type then you could follow the above procedure to Download and Install Android 10 Update for Realme X2 Pro. If you have any questions related to this post, feel free to leave that in the comment section.

Good news for Realme users, the latest stable Android 10 update for Realme X2 starts rolling out. The latest Realme X2 Android 10 update is based on Realme UI and brings tons of new features and optimizations. You can Download Realme X2 Android 10 OTA Zip from below to Update Realme X2 to Android 10.

The Realme X2 Android 10 update has the software version RMX1992AEX_11.C.05 and you must be on version RMX1992AEX_A.19 to update your phone. The update is rolling out in a phase-wise manner, which means maybe you will get the update tomorrow or maybe next 1-2 weeks. If you don’t want to wait, you could just go to Settings and manually check or follow the below guide. Download Realme X2 Android 10 OTA zip file from below.

The new Android 10 OTA Update for Realme X2 brings Realme UI 1.0 based on Android 10 and features like Visuals update, smart sidebar, Navigation Gestures 3.0, Gaming optimization, battery, and security optimization and many more. You can manually update Realme X2 to Android 10 by downloading the OTA file from below. You can check the complete changelog of Realme X2 Realme UI 1.0 from below.

Changelogs of Realme X2 Android 10 update:

  • Visuals
    • Updated UI to realme UI
    • Brand new Real Design makes visuals more attractive and operation more efficient.
  • Smart Sidebar
    • Optimized user interface and improved one-handed operation.
    • Optimized Smart Sidebar: Replaced File Console with File Manager; removed OSIE Visual Effect and No Notification Alerts.
    • Drag an app out of Smart Sidebar to open it in Split-screen Mode.
    • Added two new features: “Assistive Ball Opacity” and “Hide Assistive Ball on Fullscreen App”.
    • Optimized the Floating Window feature for more apps.
    • Added Bubbles: A bubble is displayed when you open an app in a floating window from the Smart Sidebar. Tap the bubble to collapse or open the app.
  • Screenshot
    • Optimized 3-Finger Screenshot Gesture: Use 3 fingers to touch and hold the screen, and swipe to take a screenshot of the selected part of the screen (partial screen capture). Use 3 fingers to touch and hold the screen, and swipe your fingers outwards to capture a long screenshot.
    • Added screenshot settings: You can adjust the position of the screenshot preview floating window and set the screenshot sound.
    • Optimized screenshot preview floating window: After taking a screenshot, drag it up and release to share it, or drag it down and release to take a long screenshot.
  • Navigation Gestures 3.0
    • Optimized gestures: All gestures are supported in landscape mode.
  • System
    • Added Focus Mode: Minimizes outside distractions when you are learning or working.
    • Added whole new charging animation.
    • Optimized the Quick Settings user interface for easier one-handed operation.
    • Added pause feature for screen recording.
    • Added a floating window and settings for screen recording.
    • New sounds added for file deletion, calculator key touches, and compass pointer.
    • Optimized system built-in ringtones.
    • Added TalkBack floating prompts for Accessibility.
    • New management feature for recent tasks: You can view memory of recent tasks and locked apps.
  • Games
    • Optimized visual interaction for Game Space.
    • Optimized loading animation for Game Space.
  • Homescreen
    • Added new live wallpapers.
    • Added artistic wallpapers.
    • Added option to open Global Search or the notification panel when swiping down on homescreen.
    • Added option to customize the size, shape, and style of app icons on homescreen.
    • Optimized the graphic design of password unlock to facilitate one-handed operation.
    • Support for animated wallpapers on the lockscreen.
    • Added a Simple Mode for homescreen, featuring larger fonts, icons and a clearer layout.
  • Security
    • Random MAC address Generator: When your phone is connected to Wi-Fi network system generates a random MAC address to avoid targeted ads and protect your privacy.
  • Tools
    • In Quick Settings or Smart Sidebar, you can open Calculator in a floating window.
    • Added the trim feature in Recordings.
    • Added the Weather (dynamic) ringtone, which automatically adapts to the current weather.
    • Added weather-adaptive animations in Weather.
  • Camera
    • Optimized the Camera UI for better user experience.
    • Optimized the Timer UI and sound.
  • Photos
    • Optimized the Album UI for a clearer structure and photo thumbnails.
    • Added Album Recommendations that recognize more than 80 different scenes.
  • Communications
    • realme Share now supports sharing files with OPPO, Vivo and Xiaomi devices.
    • Optimized the Contacts UI for a more efficient experience.
  • Settings
    • Search Settings now supports fuzzy match and contains a search history.
  • Application
    • Added YT music
  • Battery
    • Updated decimals display during charging
    • To deepen user’s perception of fast charging, it will always be displayed when your phone is charging and the screen is bright.

Before You Begin

  • This method is only for Realme X2. Don’t try this on any other device.
  • Follow the steps correctly otherwise, you may brick your device. We Guidegeekz.com is not responsible for any damage to your phone.
  • Charge your device to 60- 70% to prevent it from the accidental shutdown.
  • Take a complete backup of everything important.

Download Android 10 Update for Realme X2

  • Realme X2 RMX1992AEX_11.C.05 OTA – Download
  • Realme X2 RMX1992EX_11.C.05 OTA – Download

How to Install Android 10 Update on Realme X2 –

Method 1 –

1) Download Realme X2 RMX1992AEX_11.C.05OTA Zip from above and save it to internal memory.

2) Reboot Realme X2 to Recovery mode by using the below steps.

  • Turn Off your device
  • Press and hold the ‘Vol down+Power’ button.

3) Choose the language you want.

4) In recovery mode select Install from storage device.

5) Choose the zip file from phone storage or From the SD card and wait.

6) Done! Reboot your phone after the process complete.

Method 2 –

  1. Download the Realme X2 Android 10 OTA zip file from above and save it on your device.
  2. Go to download folder and rename the file to update.zip
  3. Place it to the root directory of internal storage.
  4. Click the firmware to start the update.
  5. Wait for the update to finish and restart when prompted.

Wrapping Up:

Realme X2 brings all Android 10 features along with new Realme UI and will soon be available for all via OTA but if you’re the impatient type then you could follow the above procedure to Download and Install Android 10 Update for Realme X2. If you have any questions related to this post, feel free to leave that in the comment section.

Good news for Nokia users, latest stable Android 10 update for Nokia 7.2 starts rolling out. HMD’s head Juho Sarvikas quoting “Android 10 now available for Nokia 7.2! Check your phone to see if the latest features have already landed. For more news of Nokia smartphones and Android 10”. via Twitter. You can Download Nokia 7.2 Android 10 OTA Zip from below to Update Nokia 7.2 to Android 10.

The new Android 10 OTA Update for Nokia 7.2 brings all Android 10 features like a system-wide dark theme, Smart reply, full-screen gesture navigation, additional controls for privacy and location, along with March 2020 security patch. You can manually update Nokia 7.2 to Android 10 by downloading the OTA file from below.

The new Nokia 7.2 Android 10 update has the software version v2.250 and rolling out in a phase-wise manner. Means maybe you will get the update tomorrow or maybe next 1-2 weeks. If you don’t want to wait, you could just go to Settings and manually check or follow the below guide. Download Nokia 7.2 Android 10 OTA zip file from below.

Changelogs of Nokia 7.2 Android 10 update

Changelogs of Nokia 7.2 Android 10 update:

  • Dark Mode – Take it easy on your eyes
  • Smart reply – Save more time with recommended actions
  • Gesture navigation – Get around with a swipe and pull
  • Additional controls for privacy and location
  • Google Security Pach (2020-03 / March 2020)

Before You Begin

  • This method is only for Nokia 7.2. Don’t try this on any other device.
  • Follow the steps correctly otherwise, you may brick your device. We Guidegeekz.com is not responsible for any damage to your phone.
  • Charge your device to 60- 70% to prevent it from the accidental shutdown.
  • Take a complete backup of everything important.

Download Android 10 Update for Nokia 7.2

  • Nokia 7.2 Android 10 OTA Zip – Download

How to Install Android 10 Update on Nokia 7.2 –

Method 1 –

1) Download Nokia 7.2 Android 10 OTA Zip from above and save it to internal memory.

2) Reboot Nokia 7.2 to Recovery mode by using the command adb reboot bootloader or by using the below steps.

  • Turn Off your device
  • Press and hold the ‘Vol Up+Power’ button. Release the power button upon vibration, but keep the volume key pressed.
  • If you will see no command with dead Android
  • Now press Volume Up + power to enter into recovery mode.

3) In recovery mode select Apply update from SD Card.

4) Choose the zip file and wait.

5) Done! Reboot your phone after the process complete.

Method 2 –

  1. Download the Nokia 7.2 Android 10 OTA zip file from above and save it on your device.
  2. Go to download folder and rename the file to update.zip
  3. Place it to the root directory of internal storage.
  4. Open Phone app and dial *#*#874#*#* to update.
  5. Wait for the update to finish and restart when prompted.

Method 3 – 

  1. First, enable the USB debugging option from setting ->developer option. To enable Developer Options, go to About phone and tap the Build Number 7 times.
  2. Download ADB and Fastboot and install it on your PC.
  3. Download Android 10 OTA zip for Nokia 7.2 from above Copy ROM to a folder where adb installed.
  4. Now Turn Off your phone and boot into the recovery mode.
  5. Choose Apply update from ADB
  6. Now Connect your phone to your Laptop/PC
  7. On ROM folder press shift+right click and click on open command here.
  8. Now check your connection status by typing the below command
    adb devices
    if your device is listed, you’re ready to flash the ROM
  9. Now Install Android 10 OTA on Nokia 7.2 by typing below command
    adb sideload File-Name.zip 
  10. Now, wait until the process completes and then Reboot the phone.
  11. Done!

Wrapping Up:

Nokia 7.2 brings all Android 10 features and will soon be available for all via OTA but if you’re the impatient type then you could follow the above procedure to Download and Install Android 10 Update for Nokia 7.2. If you have any questions related to this post, feel free to leave that in the comment section.

You must notice that Youtube starts playing the videos in the standard definition “480p” by default and temporarily removed the option for users to manually select a resolution above 480p on mobile phones in India. The step is taken because streaming video requires more internet bandwidth than music, messaging or maps and restricting streaming services to 480p eases internet traffic during the coronavirus outbreak. But there is still a way to watch Youtube videos in HD during Lockdown.

According to the data, this month internet traffic increases around 20 to 40 percent than usual due to the COVID-19 pandemic. Many other video providers including Netflix, Amazon Prime, Hotstar, and Disney+, are also slashing streaming quality to avoid internet congestion. Reducing the bandwidth needed for streaming services might help with that but there is still a way to want to watch Youtube videos in High Definition during coronavirus outbreak.

To watch Youtube videos in HD during Lockdown you need a third-party app called Newpipe. NewPipe is a free lightweight open-source Youtube client that brings the original YouTube experience on your smartphone without annoying ads and unwanted permissions. NewPipe does not use any Google framework libraries and can be used on devices without Google Services installed. With this app, you can watch Youtube videos in HD, FHD, UHD, and even in 4K resolution.

How to Watch Youtube Videos in HD during Lockdown

The new NewPipe app is not affected by the recent Youtube update that capping the videos at 480p. To watch Youtube videos in high definition you need to download and install NewPipe v0.19.1 on your Android device. Follow the below steps to download NewPipe apk to watch Youtube videos in HD during the Coronavirus pandemic.

  • Enable the unknown sources ( by goto Settings -> Security -> Enable Unknown Sources ) to Install NewPipe apk.
  • Download NewPipe apk either from its official website or from Github.
  • Now install NewPipe apk on your device.
  • Now open the app, play your desire video, select the quality and you are good to go.

Wrapping Up:

This is the best way to watch Youtube Videos in HD during Lockdown. So if are stuck at your home and want to watch Youtube videos in high definition then you should check the NewPipe app. Other than playing video in high definition, this app has other features like open-source, Adfree experience and independent of Google services which make it worth download.

Amazon comes up with some of the most interesting and amazing products which can be used by the audience. The latest product that has is the amazing Amazon Fire Stick. There are so many different features that would fulfill all the needs and requirements that people tend to have these days. This is especially pretty good news for the youngsters out there. One of the best things about it is you can easily Pair Amazon Fire Stick with Alexa.

Some of the most amazing features that Amazon Fire Stick has would be the voice search along with new parental controls as well. However, one of the biggest news about the Amazon Fire Stick which we absolutely love is that it can be easily paired with Amazon Alexa which is another great product by Amazon. So, how is one supposed to Pair Amazon Fire Stick with Alexa in the best way? Well, we are here to tell you all about it.

To link your Amazon Fire Stick with Alexa you must register both devices to the same Amazon account. If you only have one Firestick registered to your account, Alexa should complete the linking process automatically otherwise you need to use the Alexa app to pair. Each Alexa device can only be used to control a single Fire Stick.

How to Pair Amazon Fire Stick with Alexa

When you want to pair up Amazon Fire Stick with Amazon Alexa, then there are a few things that you will have to do right here. We have some tips which are going to be the best help to you to pair Fire Stick with Alexa. We are going to provide you with some step by step instructions to make your job even easier. There are two ways to control your fire stick with Alexa. First either from Alexa app or from Firestick TV.

Method 1 – Pair Amazon Fire Stick with Alexa from Alexa App

Pair Amazon Fire Stick with Alexa from Alexa App

  1. Open the Alexa app on your Android device.
  2. Select the menu button, represented by three horizontal lines located in the upper left-hand corner of the screen.
  3. Now open Settings and then select TV & Video.
  4. Choose the fireTV option.
  5. Select Link Your Alexa Device.
  6. Select the device that you want to link with Alexa in the list of your available Fire TV devices and choose Continue.
  7. Select the device that you’d like to use to control the Fire TV and choose Link Devices.
  8. Now you can see your linked devices within the app. You can also unlink a device or link another Fire TV to Alexa within the app.

Method 2 – Pair Amazon Fire Stick with Alexa from TV

  1. First access the Settings menu of the Amazon Fire TV by pressing the home button for some time.
  2. Now Go to TV & Video and select Fire TV.
  3. Follow the on-screen instructions.
  4. Select Link Devices to confirm your selection.

Wrapping Up:

So, these are some of the simple steps that the users need to follow in order to ensure that the Amazon Alexa device is paired properly with their Amazon Fire Stick. By doing this, they will easily be able to establish a connection between Amazon Alexa and Fire Stick. So, go ahead and try it out right now. 

Creating a boomerang is becoming trendy nowadays. Boomerang videos are either created by taking a short clip of a video or made by recorded moment or object that plays both forward and backward in a loop. Boomerang transforms a dull moment into a truly special or funny one. This feature is available by default in Snapchat or Instagram but if you are not using these apps then you can follow this article. We create a list of 5 best apps to create boomerang on Android.

Boomerang is a short video of about 10-20 seconds, a video that will be played in forward and reverse direction one by one. You can create a boomerang with your friends and family or anyone else you like. Some social media apps like the Instagram app already have this boomerang option in its camera and if you want to know more about this boomerang then just read out this article. If you are in the search of some best apps from which you can create a boomerang then you have landed at the right destination. Today’s article will be based upon the list of 5 best apps to create boomerang on Android.

5 best apps to create boomerang on Android

Boomerang video apps are an easy way to create amazing mini videos that loop back & forth. There are many Boomerang that you can download for free from the playstore. These are the 5 best apps by which you can create an amazing boomerang without any problem.

1. Boomerang from Instagram

Boomerang from Instagram

Boomerang from Instagram is one of the best apps for creating a boomerang shot. Boomerang felt refreshingly lightweight and delightful and the app reliably makes an interesting clip. The app creates captivating mini videos that loop back and forth, then share them with your friends. This app has been developed by the Instagram team for the people who wanted it to use without opening the Instagram camera. Since this app is created by famous social media developers, we can assure you that this app will functions as expected without any problems.

Features of Boomerang from Instagram:

  • Take mini videos of your life and yourself using the front and back-facing camera.
  • Download and start capturing immediately. No sign up or account required.
  • There’s just one button! The app takes 10 photos and stitches them together, speeds up the video and then loops it back and forth.
  • Share your videos on Instagram and Facebook right from the app, or share them later from your camera roll.

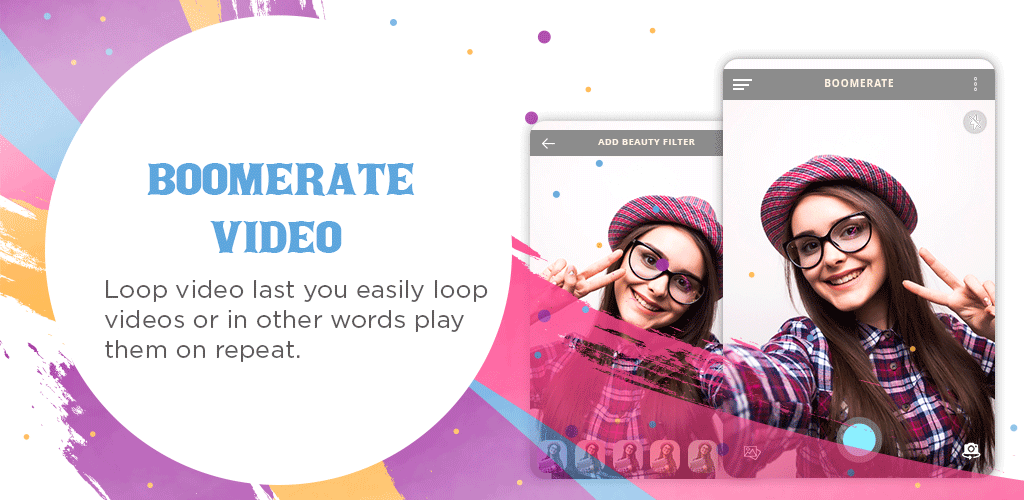
2. Boomerate Video reverse & loop

Boomerate Video reverse & loop

Boomerate Video reverse & loop is another famous app to record the boomerang. With this app, you can set the video length, FPS and everything you need. You can also make them faster or slower, you have the ability to only change the speed or set how many times the video will loop. As far as we have used this app, we find no problem with the user interface and the recording so, we can say it’s a stable app for shooting some crazy boomerangs. With this app, you can also make Boomerang from Existing Video and reverse Boomerang. Here are some features of Boomerate Video reverse & loop.

Features of Boomerate Video reverse & loop:

  • Take mini videos of your moments using the front and back facing camera, one click and the app will speed up the video and then loops it back and forth.
  • You can capture longer videos by clicking a long click on the Capture button.
  • You can make the original part slower or faster than the reversed part.
  • You can choose between Forward, Reversed, Forward + Reversed or Reversed + Forward.
  • Choose how many times the video will loop.
  • Apply filters to the video (Black & white, more filters will come in next versions)
  • No sign up or account required, Just download and start immediately.
  • Share your videos with your friends on Instagram and Facebook right from the app, or share them later from your camera roll.

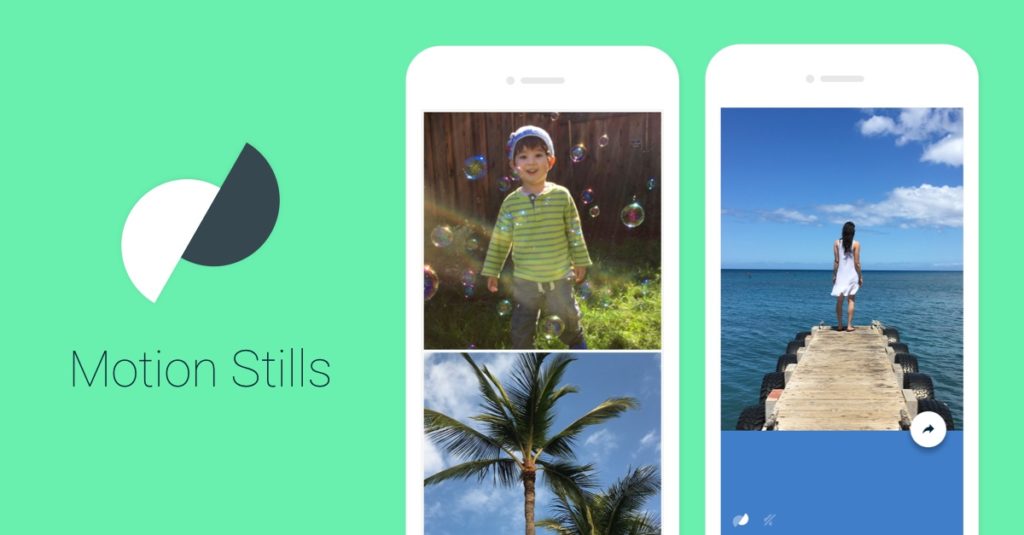
3. Motion Stills 

Motion Stills

Motion Stills is an app from Google Research. Motion stills is an amazing camera app that has some crazy camera options to create any desired video. You can create a boomerang, a slow-motion clip, hyper-lapse, GIF, boomerangs and many more. You can use this app for creating some of the best memories. If you are into the photography thing then this app might prove to be useful. Here are some features of Motion Stills.

Features of Motion Stills:

  • Capture a short 3s clip with a simple tap or condense up to a minute of video into an easy-to-watch clip using the Fast Forward mode.
  • Share your Motion Stills as looping GIFs or videos directly with your friends.
  • Create movies by combining clips with a simple swipe to the right.
  • Browse your recorded clips in a stream, or flip through them one-by-one and watch them auto-play.

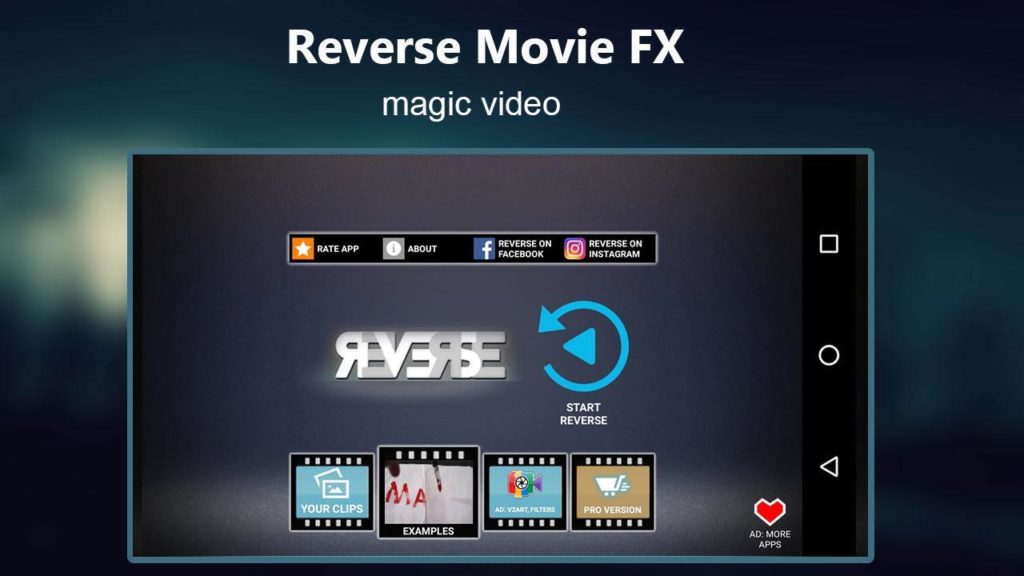
4. Reverse Movie FX

Reverse Movie FX - magic video

If you want to create a reverse Boomerang then Reverse Movie FX is the app for you. This app can also be used to create a boomerang video but for that, first, you need to shoot a video and then edit it in the app so that you can create a boomerang from it. The app does contain ads that pop up before you edit the video and afterward. You have an option to pay for the membership of this app where you can disable the ads. Overall it’s a good app for creating the boomerangs but it takes some time to understand the UI. Here are some features of Reverse Movie FX.

Features of Reverse Movie FX:

  • Best app to create reverse Boomerang.
  • The app will reverse your video.
  • Add music
  • Reversed + original (loop)
  • Original + reversed (loop)

5. Loop Video – Loop vid to GIFs & video to GIF maker

Loop Video

Loop Video is another good app to Create Boomerang on Android. The app allows its users to capture real-time videos by adding loops in them without compromising with the quality. This is an amazing looping app with more features and longer video lengths and Generate GIF and Superb Filter Effects. Here are some features of the Loop Video app.

Features of Loop Video:

  • Take mini videos of your life’s best moment of front and back camera.
  • Shoots a burst of photos and turns them into a delightful mini video. Take short videos from 1-15 seconds long.
  • Generate GIF & video files and save them into your camera roll.

Wrapping Up:

These are the 5 Best Apps to Create Boomerang on Android. If you are looking apps to create Boomerang, create reverse Boomerang, or want to create Boomerang from existing video, then you should check the above apps.

With the rise in Covid-19 cases in India, the government and different telecom companies are trying their best to reduce the pandemic from spreading any further. Initially, all telecom began the awareness campaign by implementing the caller tune for their users. And now two leading telecom operators Jio and Airtel launch tool to let you check your symptoms for coronavirus. You can Check Your COVID-19 Risk Level Using Coronavirus Symptom Checker Tool.

Coronavirus Symptom Checker Tool enables users to determine if they are suspected of having coronavirus. It determines the person’s COVID-19 Risk Level based on the answers given while also suggesting measures and guidelines on testing. The Corona Virus self-diagnostic tool also suggests if there is a need to visit the health center or not. Check Your COVID-19 Risk Level Using Coronavirus Symptom Checker Tool from below.

Check Your COVID-19 Risk Level Using Coronavirus Symptom Checker Tool

Reliance Jio launched a coronavirus risk checker tool on the MyJio app, while the Airtel introduced a similar feature in the Airtel Thanks app. Both the tools are similar that comes with basic questions about a user’s age, gender, travel history and medical records to tell user Coronavirus risk level. We shared steps to use both tools from below.

Check Your Coronavirus Risk Level Using Airtel’s Coronavirus Symptom Checker Tool

Airtel has launched a Covid-19 symptom checker tool called “Apollo247” in association with Apollo Hospitals. The tool is based on the guidelines of the World Health Organisation (WHO) and the Ministry of Health and Family Welfare (MoHFW) and available within the Airtel Thanks app.

The tool is a risk scanner that comes with basic questions about a user’s age, gender, travel history and medical records to assess how much danger the person has from the deadly disease. The tool categorizes users as High Risk or Low Risk based on their answers. Airtel users can access the tool within their Airtel thanks app, while others can go over to this Website to check it out for themselves.

  1. Make sure you have installed the latest version of the Airtel Thanks app on your phone.
  2. On the app home screen, you will be able to see an option that reads, “Scan your fear away.”
  3. Tap on it and you will be redirected to another page that will ask you a few questions ranging from one’s age, gender, symptoms if any, and also the travel history.
  4. Once all this is done, you will be given out a result that categorizes users as High Risk or Low Risk based on their answers
  5. In the end, you will also advise taking some Prevention and Precautions.

Check Your Coronavirus Risk Level Using Jio Coronavirus Symptom Checker Tool

Reliance Jio also joined the initiative by launching a new self-diagnostic tool called “Coronavirus – info & tools” and comes with the slogan ‘#CoronaHaaregaIndiaJeetega’. The app is similar to Airtel’s tool and test user if they have coronavirus and if there is a need to visit the health center or not. Jio users can access the tool within their MyJio app, while others can go over to this Website to check it out for themselves.

The tool has various profiles, you need to select from the given options for whom this test is for – Yourself, Parent, Spouse, Child or Someone else. Here is a step by step guide to use MyJio Coronavirus Self Diagnostic tool to check symptoms and determine chances.

Check Your Coronavirus Risk Level Using Jio Coronavirus Symptom Checker Tool

  1. Open the MyJio app on your Android/iOS device.
  2. From the side menu, you need to tap Coronavirus – info & tools.
  3. Once clicked COVID-19 page will appear on the screen.
  4. Tap on the Symptoms Checker option.
  5. Answer the questions correctly as they surface, following which your results will be out with the precautions.

Wrapping Up:

Both these apps are undoubtedly helpful to self assess your risk levels but it is always advisable that you do contact a doctor if you have any symptoms or if you have a travel history to countries severely affected by the virus.

Take Care of Yourself, Stay at Home, Stay Safe.

Amazon has finally started rolling out Prime Video profiles feature which is similar to Netflix that lets you add up to six user profiles. The update is already available in India for Fire TV and soon will be rolled out globally. One Amazon Prime Video account users can create up to six user profiles which include one default profile and five more for kids and others. Check How to Add User Profiles on Amazon Prime Video app from below.

New prime video profile helps you organize your streaming progress and watch history that little bit better. Each profile will have separate watch history, recommendations, season progress and watch list based on individual profile activity. You can also create a dedicated Kids profiles that will filter out any content that is considered unsuitable for children. You can add user profile on Amazon Prime Video from a website, Android or iPhone app or from Prime Video app on Fire TV.

How to Add User Profiles on Amazon Prime Video app

Adding User Profiles on Amazon Prime Video is very simple. You can have up to six user profiles within Prime Video on a single Amazon account. You can easily create and manage (edit/delete) a Prime Video Profile from App or from the website. Check How to Add User Profiles on Amazon Prime Video app or on the website.

How to add Amazon Prime video profile on Website:

How to add Amazon Prime video profile on Website

  1. Open Prime Video official website in your favorite browser and signed into your account.
  2. Go to the “Profile Picker” from the Prime Video home page.
  3. Click “Add new” to create a new profile.
  4. Click “Manage your profiles” from “Profile picker” to edit or remove your profiles.

How to add Amazon Prime video profile on Android, iOS, and Fire Tablets:

  1. Click “My Stuff” at the bottom of your Prime Video app screen
  2. Click “+” icon to create a new profile.
  3. Select the profile icon you want to manage (edit/remove).
  4. Click “Remove profiles” to remove a profile. Or Make changes to the profile and select “Save Changes” to save the edits made.

How to add profile on Prime Video app on Fire TV:

How to add profile on Prime Video app on Fire TV

  1. Go to “Profile Picker” on the Prime Video app home page.
  2. Click “+” icon to create a new profile.
  3. Enter a Profile Name and select whether this is an adult/Kids profile through the “Is this a kids Profile?” toggle.
  4. Select “Save” to create and save the profile.
  5. Select the profile from “Profile Picker” you want to manage (edit/remove).
  6. Click “Remove profiles” to remove a profile. Or Make changes to the profile and select “Save Changes” to save the edits made.

Wrapping Up:

Amazon Profile feature is helpful if your account is accessible by multiple users, each user’s content personalized separately to each profile. Each profile will have separate recommendations, watch history, season progress and watch list based on individual profile activity.

If you found this article helpful, then please share it with all your friends and followers on Social media. Leave your queries in the comment section below.